"Bitmoji Fever" Google Slides

Links


Banner




Showing posts with label Classroom Management. Show all posts
Showing posts with label Classroom Management. Show all posts
July 13, 2020


August 05, 2019

The 2019/2020 School Year
is fast approaching and I'm excited to share some new tips.


One thing I like to do is have supplies that we use a lot in a place that can be easily accessable to students. I'm not a big fan of having them on tables. I know that many art teachers use caddies on their tables and I'm sure it's great. I don't do it because it takes up too much room and kids often play with them when it's unnecessary even when they know the expectations (pick your battles, lol). I usually have a few places spread throughout the clasroom that house our basic supplies.
Here's how I organize some of them in buckets:
- markers
- crayons
- colored pencils
- erasers
- pencils
- small sharpeners
- scissors
- sharpies, etc...

I've written about organization and set-up a few times because I'm a huge believer in being organized.
This year I lined the wall under my white board with shelves and storage carts so I could have a variety of areas for students. I wanted to have a few center areas for students.
Organizing Other Supplies:

My favorite is to use fun colors and shaped buckets, storage containers, bins, etc...
 • Oil Pastels -
 I bought these cute square buckets at Hobby Lobby and they're perfect for flourescent oil pastels. I put a towel down and then students can dump the bucket so it's easier to see the colors and keep the tables cleaner. Then when done they put them back in the buckets.

I bought these cute cups from the Dollar Tree and they're perfect for metallic oil pastels.
 I do the same thing with regular oil pastels, but I keep the BLACK, PEACH and WHITE ones seperate from all other colors. I have them in their own container - like colors together. This has helped me avoid the horrible mess of oil pastels getting so disguisting you can't tell the colors a part. I also only put one set per cup and each student gets their own cup. If a color runs out I give them a new one to place in their cup - no sharing that way everyone has what they need.
 I do the same thing with chalk pastels but the only difference is I keep the BLACK and WHITE ones seperate from all other colors. Since my saying is "BLACK LAST" (usually applies) it makes it easier for students to not grab and use the black before they are finished. It also keeps the whites from getting so gross you can't tell what color it really is, lol. Once again they dump all of them out on the towels so they can share and find colors easily. This keeps tabbles cleaner and they can whipe their hands on the towels if they get too dirty. Clean up after is a SNAP!

July 27, 2019
YouTube Videos
How I use YouTube for all my expectations, procedures and lessons.
I've written about organization and set-up a few times because I'm a huge believer in having your room organized. One thing I've been doing since I started teaching is creating short videos, slideshows or use photos to show students expectations and procedures in the art room.
- One reason I started this is because they really like watching a video better than listening to me talk. Keep it short and sweet.
- Second, as an art teacher you repeat things to a ton of different classes and this helps with the "broken record" phobia, lol.
- Third, you can use the time during the video (while it's playing) to set things ups, hand out supplies, monitor students, etc... and keep the flow of the class going.
- Lastly, the videos can be paused and replayed easily by you or your students. Great for using with students who need a refresher, who were absent and who need that extra time to see how something is done.
Here's just one of my simplier videos that I use to help with "hand washing" because we know the sink area can be crazy without expectations and proedures in place.
My YouTube channel is "private" for the most part. I hope to upload some videos soon of lessons that I've created and use in my art room. You can always check out the printed versions in my TPT Shoppe "Art is My Jam"! Enjoy :)
July 17, 2019
Answering some questions...
How do you decide what supplies to order?

Art Room Supply/Medium Checklist - Supply List...check it out in my TPT Shoppe.
2. After I have my inventory, I then highlight and mark the consumables I always need every year. To figure out quantity, I just base it off the number or students in the grave/school and how often they will be used. For example: clay is always a hard one to estimate but Ive found that this works really well. One box (50 lbs.) of clay usually can do 2 classes of 28 students. Having extra clay is never a bad thing as you can do small projects at the end of the year or use it for art clubs, teacher's nights, fundraising projects, etc...

NOTE: I always place 2 orders during the school year. A big order at the beginning and a smaller order around February/March.
3. During the summer I curriculum plan by creating a basic curriculum map so I can order the supplies I need. Here's an example of how mine looks - it's very basic and yes, it'll probably change, but not enough to cause issues with my supply order. I NEVER create the exact same artwork every year, I get bored, LOL! So I'm always creating new things.

How do you keep from going through tons of markers, colored pencils, etc...?
I will admit I'm OCD to the core and I have procedures in place for everything. I found that the more supplies you put out at once the more that will be wasted and they will go through.- I use cups and buckets for all my crayons, markers and colored pencils. Each table gets 1 bucket of each. Each bucket/cup has 2-3 packs of each item in them. For example: 3 packs of colored pencils per bucket is perfect and they won't fight over the colors. Also when markers run out, they tell me and we swap them out - I take the bad one and give them a new good one. I keep the buckets full and never do they have to borrow from others to find the colors they need. With crayons, each bucket has 2-24 pack of crayons in them since there are more per pack.
- I also use cups or small bins for oil and chalk pastels. If I can, each student gets their own cup of oil pastels to use. If I can't have a cup for each student, then I have 2 sitting by each other share one cup. For chalks, I have them in little bins and we dump them out on a towel and they share per table. It's perfect. I'll discuss why I use towels in another post.
- For other things...
• Sharpies - I have one closable clear bin that I put black sharpies in and I fill it with 30 to start. As they dry up, I replace them.

• Watercolors - every 2 students shares one tray of the cake ones. If it's liquids, I have re-sealable trays that the tables share so I can put whatever colors needed in each tray.
• Paint/Glaze - I love using re-sealable cups/trays so they don't go to waste. Depending on the project, I might have students rotate tables to use the color at that table. It gets them moving and helps with waste.
June 04, 2019
2019/2020 Teacher Planner
Just finished creating my elementary/art teacher planner for the 2019/2020 school year and I'm "SUPER" excited about it!

 This binder is perfect for both elementary and art teachers. Here's the link to my TPT Shoppe where you can find it. "Superhero Themed Planner/Binder"
I've also added a few new fun designs that go with my "HERO" theme! Check them out... These are my new vocabulary word wall pieces.
I've also created table signs, posters, job tags and much more. These are so cute:) I can't wait to use them this year in my own classroom.
April 14, 2019
 Classroom Layout/Setup
 |
| Love having photos of the students work in action! |
One thing I've learned is, classroom layout is so important when teaching. It was fun redesigning my classroom for PLTW and I love how things turned out. I'm constantly re-evaluating the design and moving things to make it work for my students. Here's a few tips:
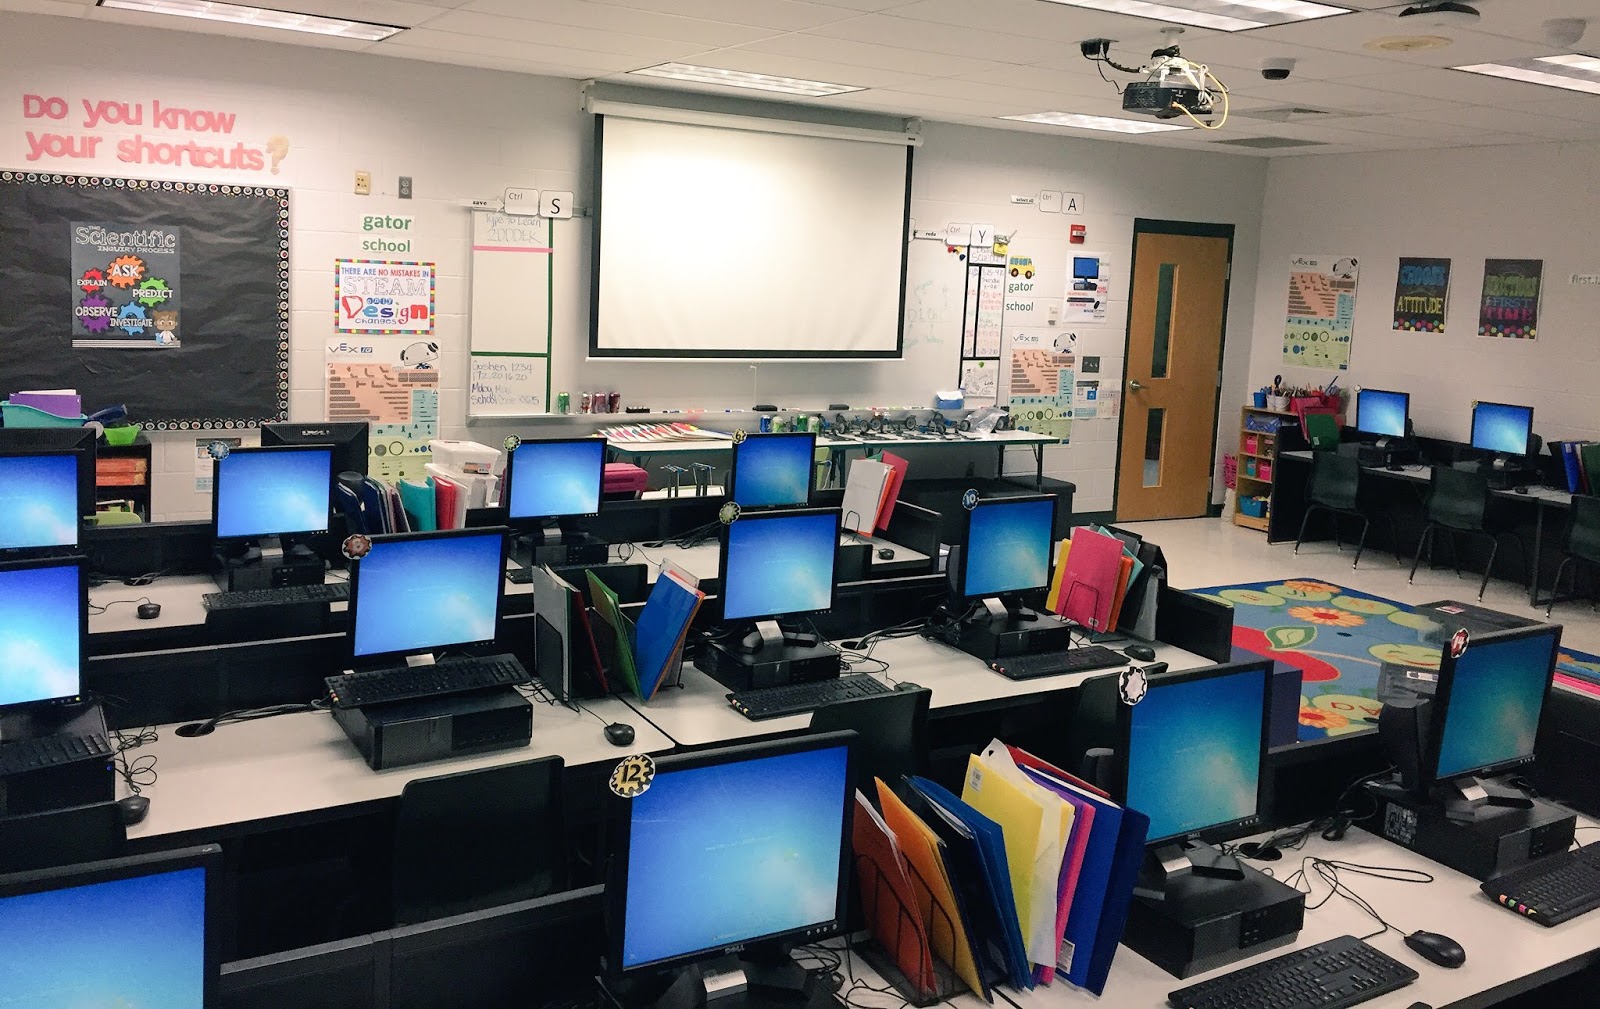
1. Make sure you have an area where kids can come together without distractions. Such as a carpet area. This was so huge for me especially since I have a computer lab as my classroom.

• username/passwords to every program we use for easy access.
 • launch logs (PLTW) and graph paper for drawing, notes, etc...
 3. Flexible seating if at all possible. I have regular chairs, rockers and cubes for students to choose from.
4. Designated supply areas.
I hope these images help anyone trying to come of with classroom layout ideas. I'll post more as I do new things and come up with other ideas.
April 05, 2019
ScratchJr®...A great coding app!
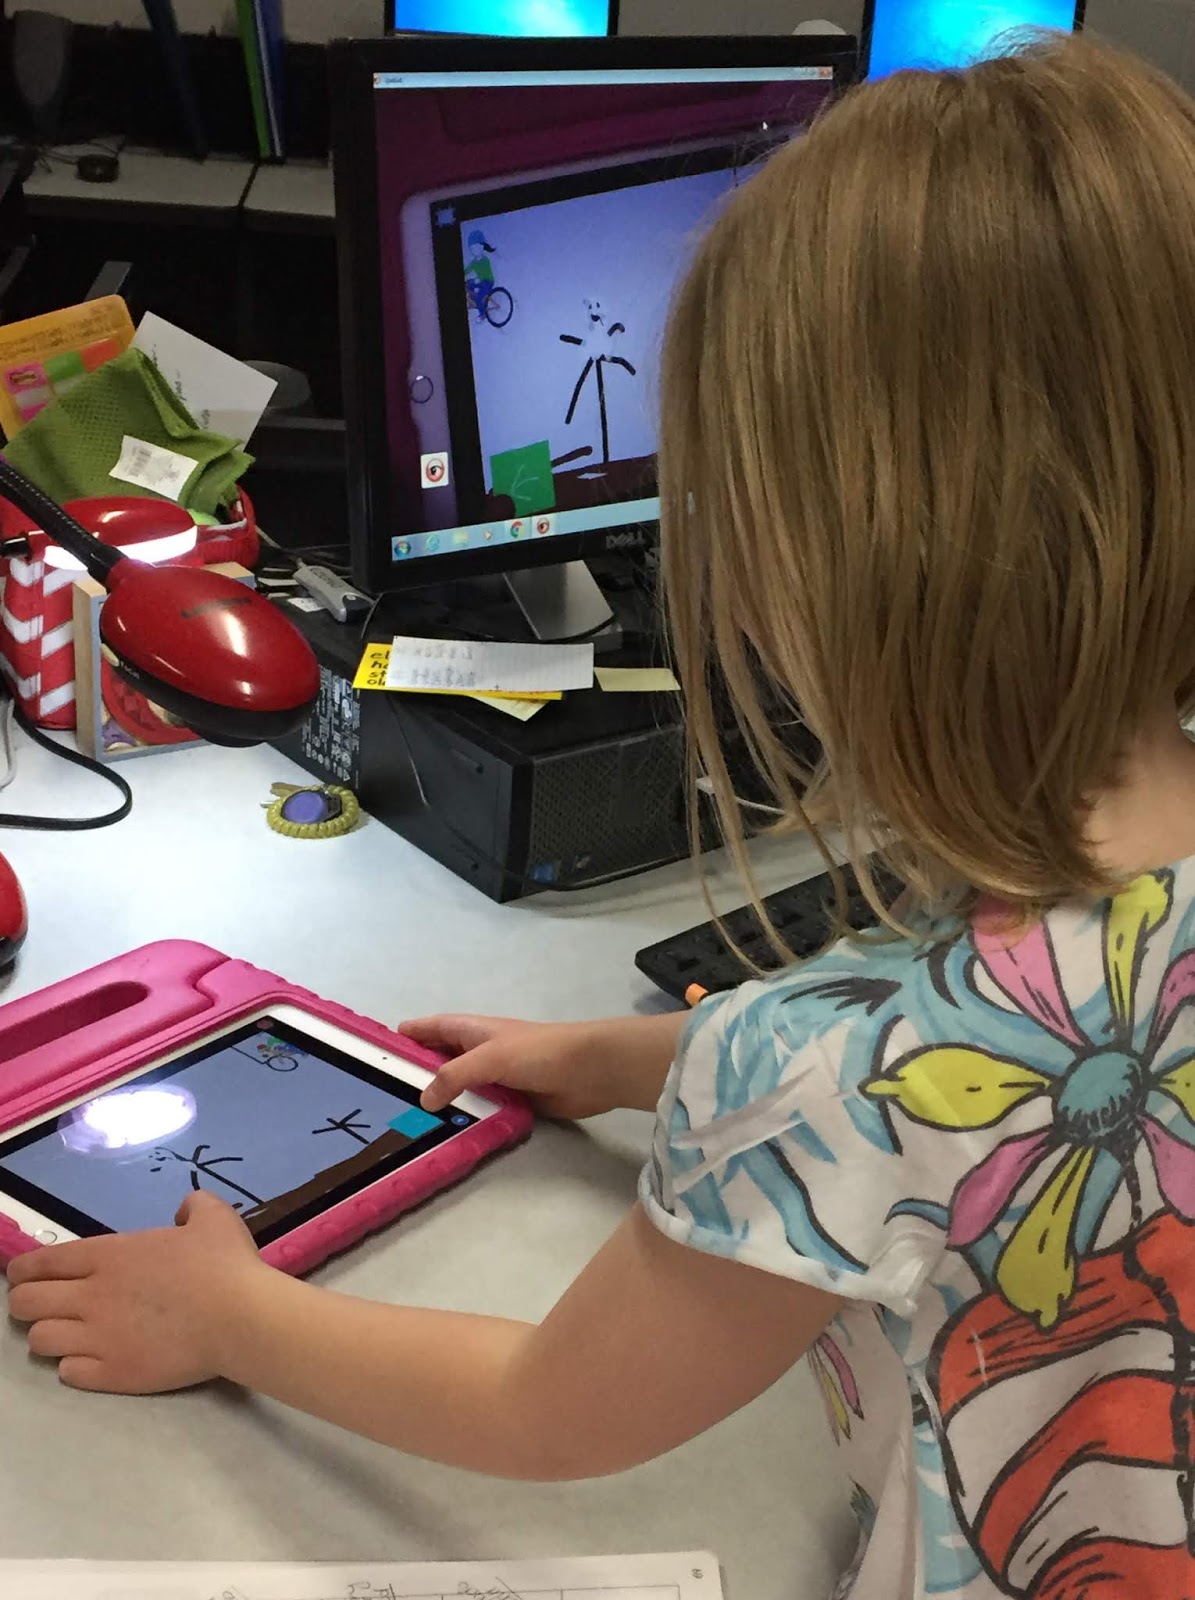
ScratchJr® is so amazing!
It's a great coding app for younger children and easy to navigate.
It's a great coding app for younger children and easy to navigate.
Check out their website and see what awesome things they offer. I use ScratchJr® with my Kindergarteners, 1st and 2nd graders to design and code programs in our STEAM class. Many of our ideas come from the curriculum that PLTW® incorporates into there modules. But, I've also designed some projects myself.
The students love it and it's so much fun, especially the part about being able to draw your own characters and backgrounds. The art teacher in me is definatley coming out here.
Below are the links to some FREE posters for you that I've created for my students. Please feel free to use them, but since ScratchJr® is copy written, I ask that you don't sell them on any site, thank you.
 |
| ScratchJr - poster1 |
 |
| ScratchJr - poster2 |
If you would like some other great resources to go with your programming curriculum check out my TPT shoppe. I've got a lot of STEm/STEAM resources to choose from. Here's a sample of what I use when setting up pair programming partners. It's a great way to get both students involved without the fighting over who gets to touch the IPads.

But, If you have to have 3 students together, this helps give them all jobs. But each child should get the opportunity to be the driver. I usually alter days or tasks so there's no confusion.
Here's the link to my Programming Jobs print in my shoppe. I use this everytime and it really makes a difference and eliminates the arguments.
 |
| 1st Grades Game Design |
August 21, 2018

STEAM - Science, Technology, Engineering, Art and Math
August STEAM Newsletter - To view the PDF, just click on the link and download the PDF to you computer. You do not need dropbox or to install anything, just download the file.

 |
| Google Classroom Learners |
February 14, 2018
The Creative Classroom Book...
Exciting News!
I'm working on my second book and I'm almost done. I just love that way this book is turning out and I can't wait to share it with art teachers, classroom teachers, homeschool parents, etc... The video above will help explain how my book looks and the great lessons that you will find inside.
It's similar to my first book in that the lessons are full illustrated, 4 color photos, links to book, videos, etc.. and so much more. If you haven't seen my first book, here's a link to it in my TPT Shoppe: "The Creative Classroom" Art Book
February 04, 2018

Art Curriculum Planner
I just finished creating a generic art planner for art teachers. I love it because it'll help keep you updated on the various types of projects you are creating for your art room. It's important as an art teacher to use a variety of different techniques, subject matter, medium, etc... with your art students. I'm hoping this planner will help you organize your ideas a lot more easily.I sell this in my TPT Shoppe, but I'm offering it here for FREE! Art Curriculum Planner
Lesson Ideas:
1. Portrait2. Still Life
3. Landscape
4. Functional
6. Expressive
7. Narrative
Medium Ideas:
1. Oil Pastels2. Chalk Pastels
3. Paint - tempera or acryllics
4. Weaving/Fabric Arts
5. Clay
6. Watercolors
7. Paper Maché or Plaster
Etc...
I have a variety of lessons in my book "The Creative Classroom" and even more posted in my TPT Shoppe.
Subscribe to:
Posts (Atom)