Step-by-Step on how to Create these:
Koinobori Fish
I decided to do this project with my Art Club because it's very time consuming, requires students to use hot wax and it's just COOL. I wanted them to create something they could have and hang up. Here's the steps I used, but of course it can be altered to fit the needs of your students and classroom.
The background of the Koinobori Fish:
Koinobori Fish are hung outside homes in Japan. They decorate the landscape of Japan from April through early May, in honor of Children's Day on May 5. In Japanese culture, the carp symbolizes courage and strength because of its ability to swim up a waterfall.
Materials:
Thick White Paper
Newspaper
Iron
Paintbrushes
Metal Eye Dropper
Batik Wax
Newspaper
Iron
Paintbrushes
Metal Eye Dropper
Batik Wax
- Different types that I have used are:
Jacquard Batik Wax and/or Jacquard Bees Wax and/or Batik Wax
*NOTE: You can also use: Batik Resist EZ, but I only recommend this on fine detail areas.
Wax Melter Kit - I absolutely love this product and recommend you get one.
Jacquard Dye Pack (variety of colors)
Steps:
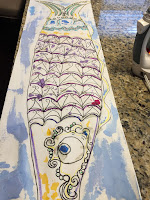 1. Students designed on paper their fish. We used thicker white 18x24 paper folded in half.
- Then outlined it in sharpie so they would be able to see the design through the fabric.
- I also had them mark their color choices before hand. This made it easier for them to choose dye when ready.
*NOTE: I put a limit on colors to 4-5 so it wouldn't get to busy.
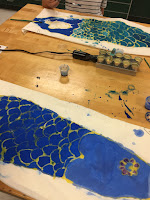 2. After design, outlining and color choices were done and approved, batiking started. I had some students using wax and other start with the EZ resist to experience both and how they worked. Because students weren't all doing the same things at the same time, this made it easy to set up areas in the room where certain things took place. It also allowed for me to monitor their progress and medium appropriately.
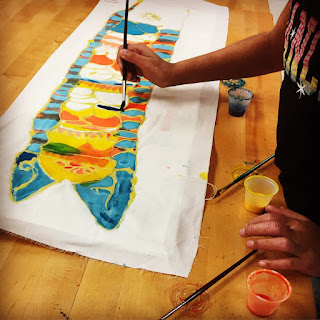
3. Fabric was cut slightly larger than the paper. I had students attach the fabric with paper clips onto their paper design. This kept the fabric from moving while batiking.
4. We used two methods of applying the batik wax: metal eyedropper and paint brushes. The EZ resist was applied using small containers with metal tips on the end which allowed for ease in control of the liquid since it spreads.
5. After all batiking wax and resist was complete, students began dyeing. I use small disposable cups with lids to pour dye in. This kept it easy to distribute and allow students the chance to use the colors they wanted without having to move around the room. Their paper stayed clipped to the fabric so it helped them remember colors and soaked up excess dye. Dye was applied using paint brushes.
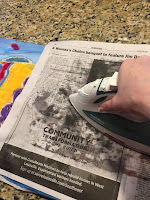 6. Once dyeing was complete and dry, removing the wax was he next step. Using newsprint and and iron, fabric was ironed to remove wax. Paper drawings remained under their art so wax didn't bleed through on the tables. The hot iron also set the dye into the fabric. You'll notice the change in dye color intensity, which is perfectly normal.
 7. After wax removed, resist was washed off. Using hot/war water all pieces were washed by hand to remove all EZ resist then hung to dry.
 8. After fabric was dry, I ironed them once more to remove wrinkles and any wax that might have been missed.
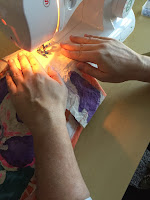
9. I went the extra step to sew the edges and add a bowl rod for hanging to the top.
I will post all the final pieces soon so check back in a week to see the results:)


